Organizing your medicine cabinet is a really quick and easy task that you can accomplish in a day. It has the potential to save you both time and money since you’ll stop wasting time rummaging around for a specific bottle, rebuying medicine that you already have, or having to go out on an emergency pharmacy run when you find out that your medicine has expired! With this guide from The Tidy Abode, you will be able to put together a practical, safe solution to organizing your medicines in no time.
Ready to get started? Here are the five steps to get your medicine cabinet organized!
1. Purge
The first step in any organization project is to empty out the space. While you are doing this go through all of your medicines and set aside anything that has expired. Make sure to add any necessary medicines that expired to your shopping list, so you do not run out!
2. Safely Dispose of Medication
Do not throw away medicine directly into the trash! It can be harmful, so please follow the FDA Guidelines. They advise to drop off medicine at a drug take back site but if you cannot, they give you the proper instructions on how to dispose of it properly. Depending on the medicine, you may either flush it or dispose of it in a sealed bag mixed with dirt, cat litter, or used coffee grounds. Check the link above for drug take back site locations and the full disposal instructions.
3. Sort By Category
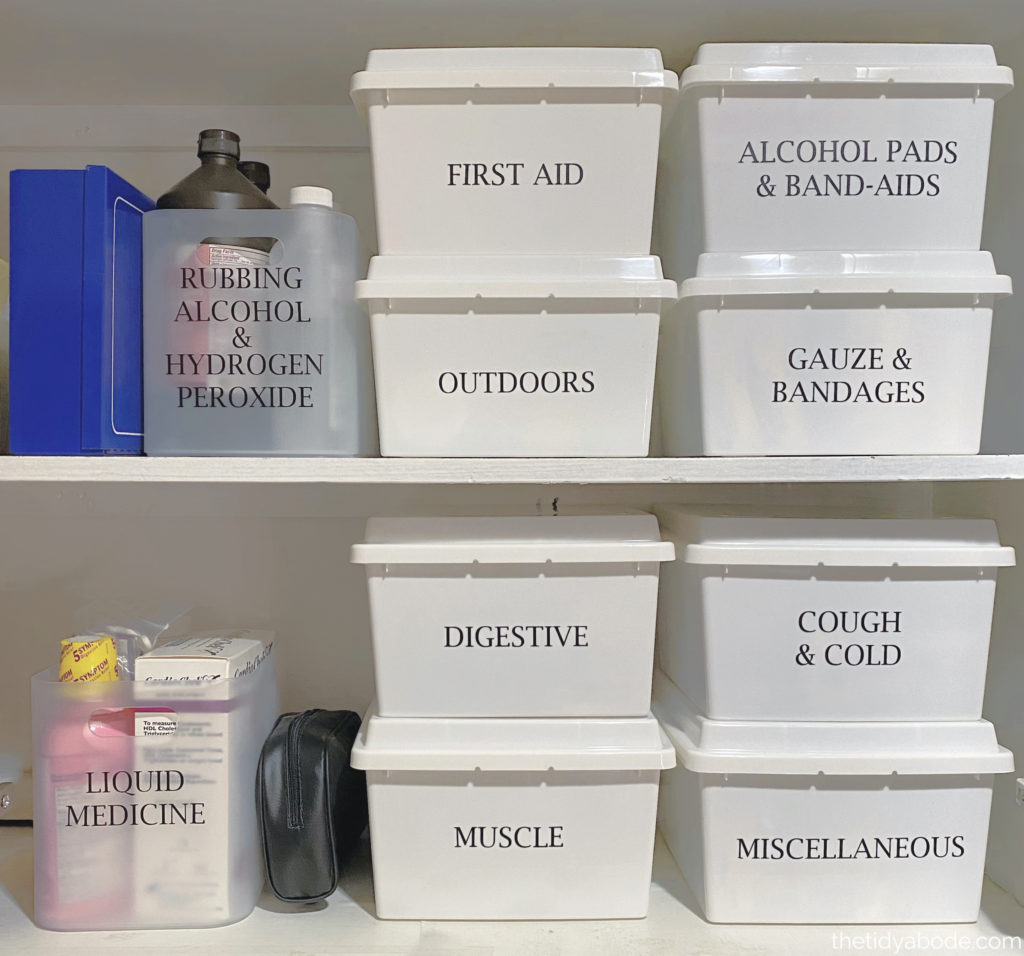
Sort the remaining medications by category. Depending on how much you have of each kind of medicine, you may want to create a separate container for each. Some common categories are: First Aid, Cough & Cold, Digestive, Pain Relief, Allergy, Vitamins, and Baby.
If you are unsure about how to split up your categories, think of where you would find each medicine in an aisle at a pharmacy and sort accordingly! Also, if you have some medications that are too few to make a category of their own, such as travel sickness pills or sunburn relief gel, you can make a Miscellaneous category and put those items there.
Disclaimer: We may receive commissions when you click our links and make purchases. However, this does not impact our reviews and comparisons. We try our best to disclose the links as well as keep things fair and balanced, in order to help you make the best choice for you.
4. Choose Containers (and a Location)
Before choosing containers, you may want to move the location of your medicines. First of all, even though medicine cabinets were traditionally found in the bathroom, medicines should not be kept there (or certain parts of the kitchen) if possible, due to fluctuations in temperature and humidity. If you are currently storing your them in one of these areas, find a place in your home that is more stable temperature-wise. Also, if you have small children or pets, make sure to store your medication either on a higher shelf or where you can lock it away. Safety first!
Now, it’s time to choose bins, baskets, or containers that will hold each of the categories you decided on. Almost anything will work! It doesn’t have to be fancy unless you want it to be. 😊 Whether you choose clear or not, it’s best to choose something easy to clean in case of a spill. Also, consider using turntables or lazy Susans so you can see and reach items in the back without knocking everything over.
5. Label!
In our “How To Your Organize Your Fridge” Guide, we tell you that it is not necessary to label your containers. However, for your Medicine Cabinet it is a must!
Everything should be crystal clear so when you are looking for something in an emergency or in the middle of the night, it can be located quickly and efficiently. Plus, for every day use everyone will know where to find a medication and where to put it back if it is clearly labeled. Simple and practical!
With these steps, you will be able to get your medicine cabinet organized right away. Let us know if you have any questions and tag us on Instagram or Facebook with your finished projects!